If you have ever wanted to get into gardening but something keeps getting in the way, and a huge property is not an option, straw bale gardening may just be the answer. Perhaps you are overwhelmed with how to get started with a garden, don’t have a lot of money to spend, or don’t have a good plot of soil; perhaps you don’t have soil at all! With straw bale gardening you can have a beautiful and easy garden no matter where you live. All you need is enough space for some straw bales, a bit of fertilizer, and a gardening trowel.
What is Straw Bale Gardening
Straw bale gardens were devised by horticulturist Joel Karsten. The idea is to use bales of straw to act as a growbag of sorts for your plants, eliminating the need for soil and significantly lowering the price for starting a garden. Straw bale gardening also lengthens growing season and allows for plants to thrive in colder climates. As the straw bales decompose, they quickly release heat and keep your plants warm from early spring into the fall increasing the growing season by up to a month. The lack of soil also means no soil-borne diseases and little to no weeds. These benefits come at a small cost, however. Plants require nitrogen and nutrients to survive and straw bales naturally do not have enough to sustain a garden. This means they need to be added via conditioning which takes a few weeks.
How to Get Started
Before you start gardening you are going to need some straw bales of course. These can be purchased at many garden centers or plant nurseries for a small price. If possible, you can even contact local organic farms that may have bales to sell. Make sure that you purchase straw bales rather than hay bales. Hay bales are used to feed livestock and break down much quicker, resulting in your bale crumbling before growing season is over. Hay bales also have a much higher chance to have seed in them, resulting in unwanted sprouts in your garden. Straw bales are made from leftovers of grain crops and therefore are much less likely to have seeds and will decay much slower, sometimes even lasting for multiple growing seasons. Once you have your bales you are going to need a nitrogen rich fertilizer to condition them with, we recommend blood meal, but any organic nitrogen rich fertilizer will work. You will also need a gardening trowel for planting your garden, and any seeds you wish to plant.
Conditioning the Bales
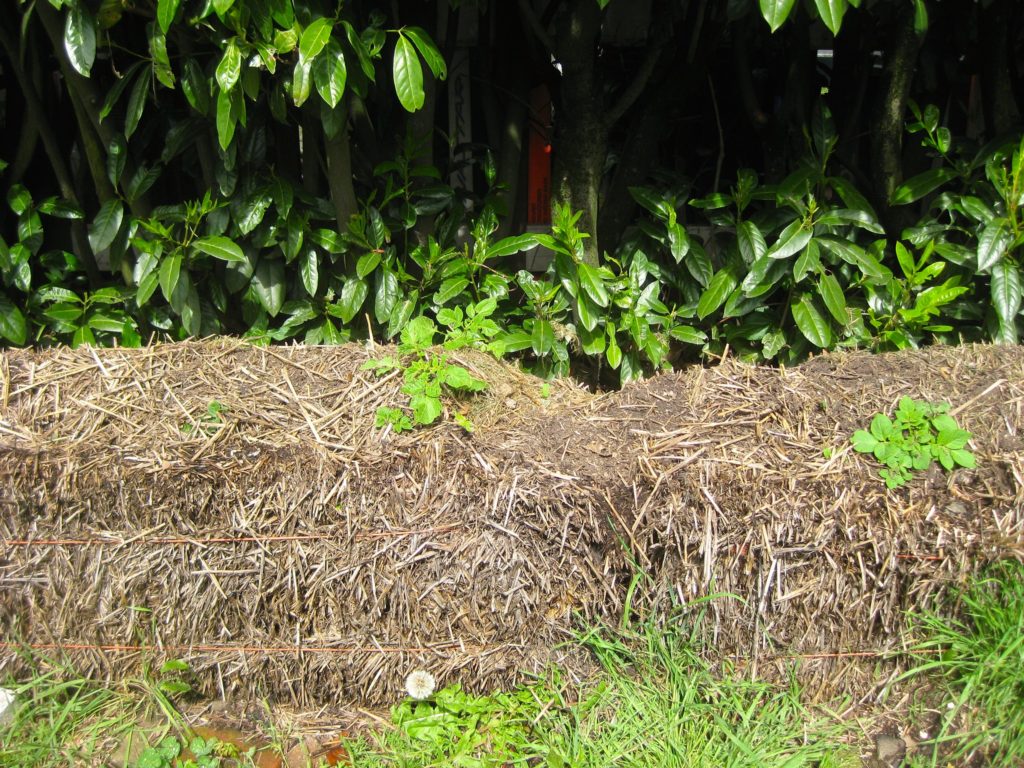
Plants need nitrogen to grow and straw bales have very little, so you will need to condition them before planting your garden. The process of conditioning your bales will take 14-18 days so consider when you want to start growing your crops and begin conditioning early. Arrange your bales cut side up so that the straws are facing up and water will penetrate easier. Start by poking a few holes in your straw bales and adding a generous amount of your nitrogen rich fertilizer. Fully soak the bales with about a gallon of water each and make sure the fertilizer soaks in. Continue watering everyday and adding more fertilizer every other day. The bales should start to heat up and feel warm when poking a finger inside. Black compost clumps and mushrooms may start to appear. Continue this process, checking the heat inside the bale frequently, when the bale starts to feel slightly cooler than body temperature you are ready to start planting your garden!
Planting Your Garden
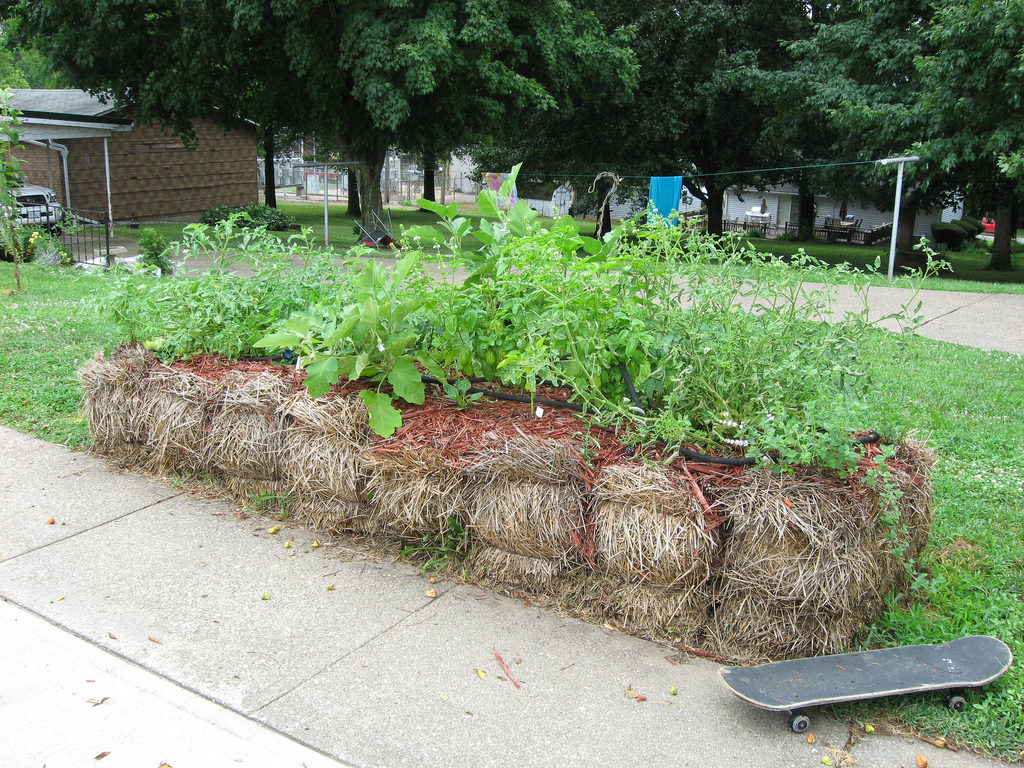
Now that you have properly conditioned your straw bales you can finally plant your seeds and start gardening. You can plant almost anything in your straw bale garden, but some plants are best avoided. Top heavy plants such as corn can be too much for the straw bale and fall over, running plants that spread through their roots can also be tricky to grow in bales. Plants that need support such as tomatoes should have similar support on your straw bales. Popular plant varieties for straw bale gardening include tomatoes, squash, strawberries, peppers, leafy greens such as lettuce, kale, and spinach, root vegetables or tubers such as potatoes, carrots, and turnips, and many herbs such as basil or cilantro. Follow the seed packets instructions for spacing as you would when planting in soil. Seeds can be planted directly into the straw, however, for smaller seeds you may want to add a small layer of sterile soilless mix on top of the bale. If planting seedlings make a hole in the bale large enough to accommodate all the roots.
Many people also like to plant annual seeds in the side of the bale to attract bees and other wanted insects. Plants that can grow on the side of the bale and are excellent bug attractors include marigolds, dwarf cornflowers, and borage which will not only help your garden to thrive but also make it look pretty. Perennial herbs are also an excellent choice for the sides of your bale garden.

Maintaining your Garden
Like with any garden you will need to properly care for your straw bale garden to provide for your plants. Watering is important for any gardening routine, but straw will dry up quicker than soil, so watering is very important in straw bale gardens. A watering system is recommended because of how much your plants will need. One bale of straw should get one gallon of water a day, or more once the plants have grown significant roots. A hose or drip irrigation system is advised. Weeds are far less common in straw bales than soil, but they may still pop up occasionally. Treat these weeds as you would in a soil garden and pull them up from the base. Keeping in mind these tips, treat your garden as you would a soil one and care for your plants and you will have a plentiful harvest in no time!


Recent Posts
- Smart Gardening: How Technology Is Revolutionizing Horticulture
- Understanding Gardening Zones: What You Need to Know
- The Right Tools For Your Gardening And Landscaping Needs
- Maximizing Your Harvest: Square Foot Gardening Chart for Beginners
- Holiday Garden Scents: Plants for Natural Aromatherapy in Your Home